
Log in
Affiliates


Who is online?
In total there are 2 users online :: 0 Registered, 0 Hidden and 2 Guests None
Most users ever online was 108 on 2019-05-14, 20:53
Search
Similar topics
Wip Eldar corsairs
+3
Johnny KTOU
syxx
KAOS JOKER
7 posters
Warbunka - BRGA :: Community :: Gallery
Page 4 of 5
Page 4 of 5 •  1, 2, 3, 4, 5
 ![]()
Re: Wip Eldar corsairs
![]() BDA 2014-07-16, 13:05
BDA 2014-07-16, 13:05
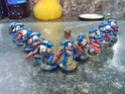
And now for some marines 
These are my vet squad and glad I painted them at last as I have always wanted to use them
These are my vet squad and glad I painted them at last as I have always wanted to use them

BDA- LVL 7 Mobile Armoured Dice Factory

- Posts : 871
EXP : 5917
Join date : 2011-02-09
Age : 44
Re: Wip Eldar corsairs
![]() BDA 2014-07-23, 12:57
BDA 2014-07-23, 12:57
Well as some of you might have seen my imperial knight sir Stompy the 1st made his first appearance last night vs Sam.
So now I can post his pictures on here. he looks good cos he took a long time lol
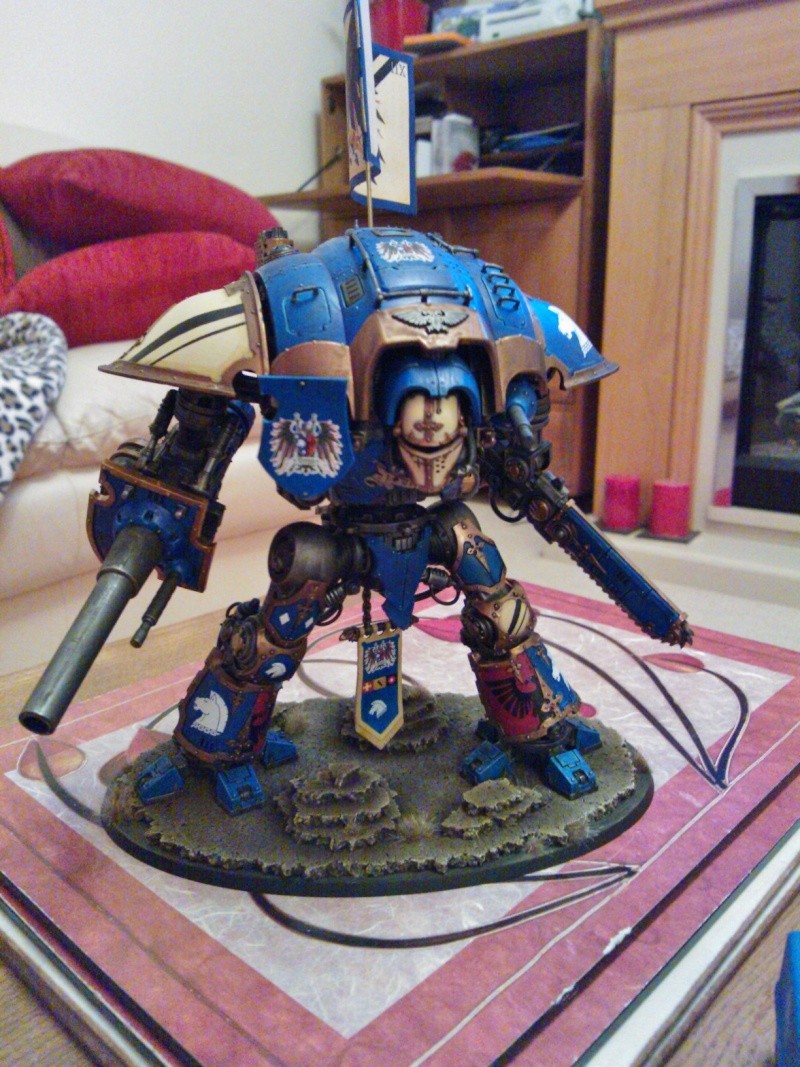
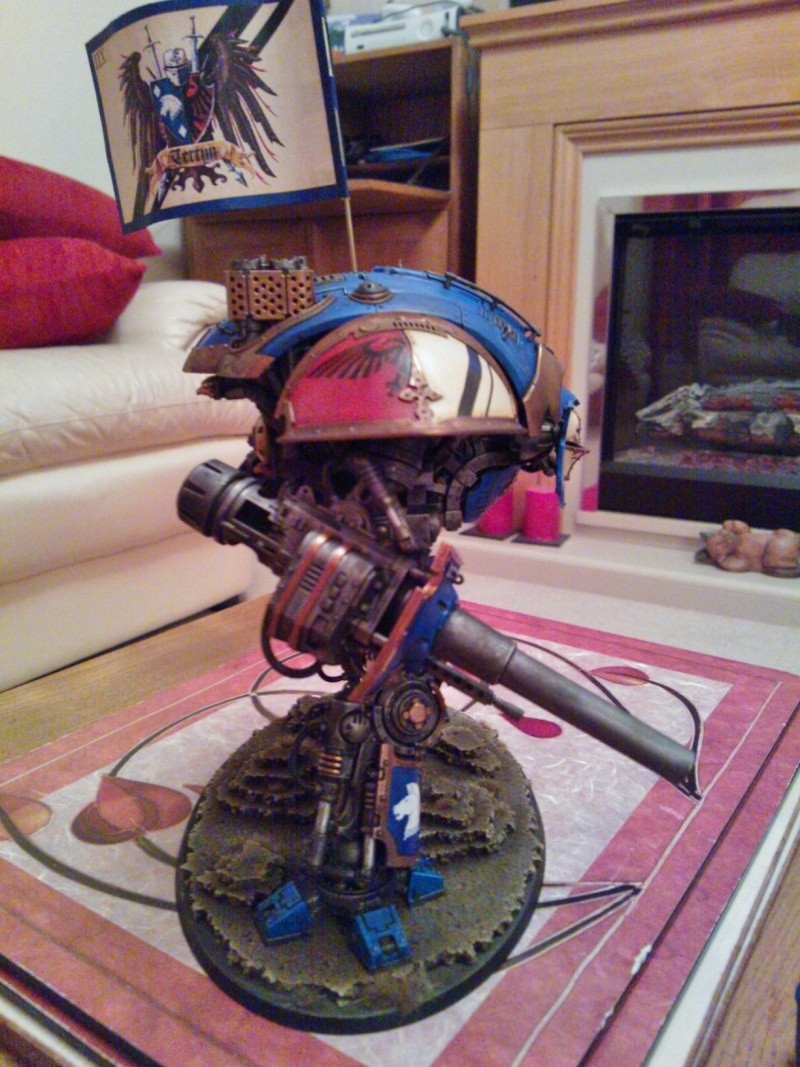
His base was made from 3mm thick cork tiles torn up and then dry brushed different shades of brown concentrating more on the edges
So now I can post his pictures on here. he looks good cos he took a long time lol
His base was made from 3mm thick cork tiles torn up and then dry brushed different shades of brown concentrating more on the edges
BDA- LVL 7 Mobile Armoured Dice Factory
- Posts : 871
EXP : 5917
Join date : 2011-02-09
Age : 44
Re: Wip Eldar corsairs
![]() BDA 2014-09-12, 12:40
BDA 2014-09-12, 12:40
Ok I have transferred this back to the WIP Eldar corsairs section cos well it is work in progress on my Eldar corsairs
Well I got all the results in and wing B won by 1 vote over wing C so I might have to a bit of both. Jetpack 2 won hands down so while that is good it will take a bit of creative thinking as I think it will be a pig to cast lol.
Anyway I got a little test work done on a wing B yesterday lunch time as it looked like it was a contender and was easier to cut out than wing C.
I got hold of some 1mm thick plasticard and found that is ideal for the main wing section but it becomes too thick when I put the wing frames on so now I can.
A: stick it on and sand it down
B: try my hand and some green stuff on there
C: etch the frame pattern on the wing
D: but the frame out of 2mm thick plasticard and stick them together.
I might have a little go at all of them and see how it works out
Here is the progress shots from yesterday lunchtime
BDA- LVL 7 Mobile Armoured Dice Factory
- Posts : 871
EXP : 5917
Join date : 2011-02-09
Age : 44
Re: Wip Eldar corsairs
![]() BDA 2014-09-12, 13:21
BDA 2014-09-12, 13:21
And a little progress update from today as well 
Wing C is just imposable to cut out (at work anyway) at this scale with the tools I have to hand but could try bringing in my pin vice drill.
I have tried hand sculpting the wing frame wiht some green stuff and that has turned out ok so might to that way for the moment until I hit another potential snag lol
will let it cure before i trim it down a bit and sand it flatter as well as sorting out the other side
BDA- LVL 7 Mobile Armoured Dice Factory
- Posts : 871
EXP : 5917
Join date : 2011-02-09
Age : 44
Re: Wip Eldar corsairs
![]() BDA 2014-09-19, 15:25
BDA 2014-09-19, 15:25
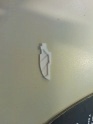
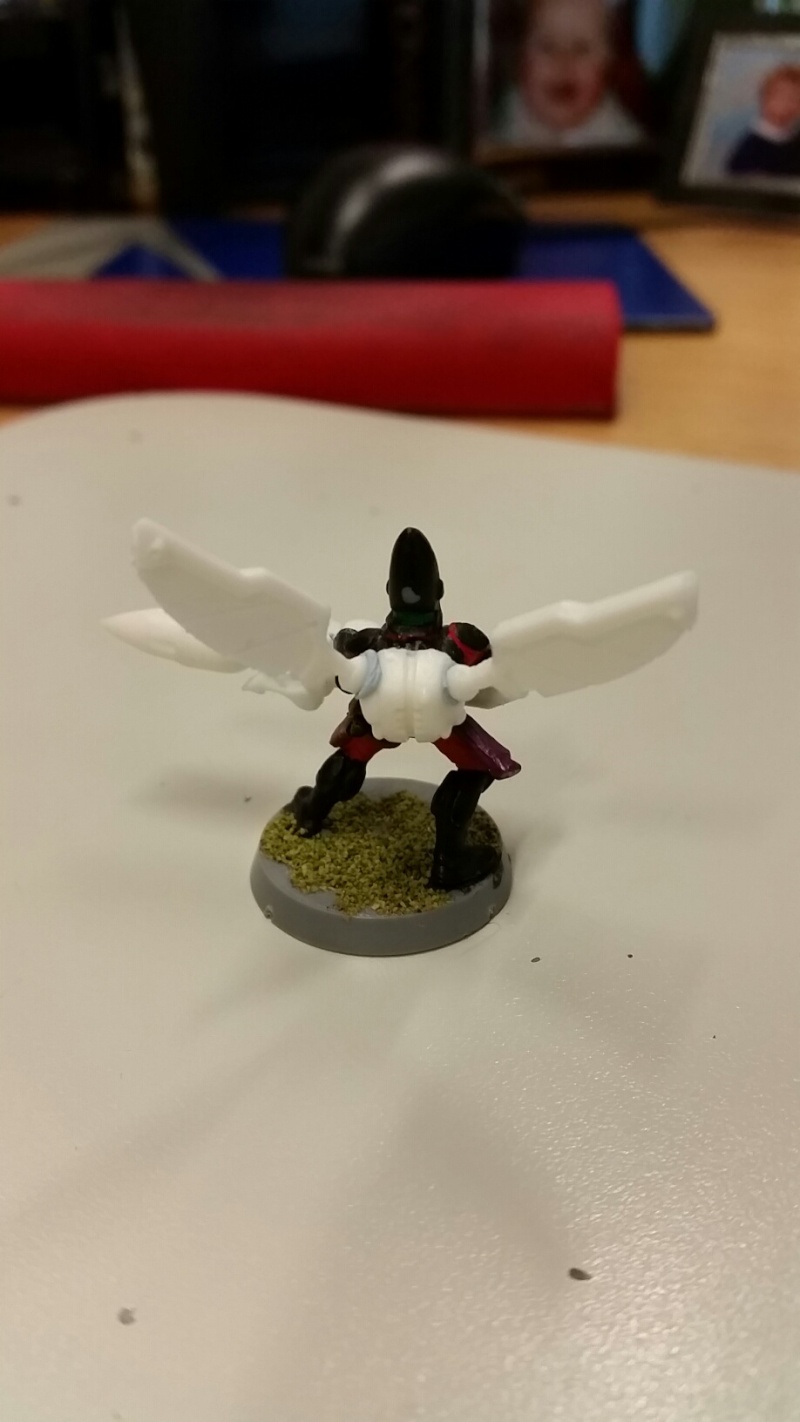
So the jetpack part is taking form
Started off by cutting a 5x5mm bit of 2mm thick plasticard as the basis. This has helped a lot I must say
Then I used a file to create the dents and then used green stuff to get the shape and increase its depth. I have no moved onto the other side that attaches to the guardian.
It is a fair bit from finished but all in all I am pleased with the progress.
As you can see the wing can glued in a folded or up positions as required.
Wing part C is proving to be a pain in the bottom as this scale cutting the curved vains is proving difficult even on 1mm thick stock, was planning on cutting it out and then using green stuff to make it curved but might have to cut out the very basic shape and then use green stuff to define it but I am beginning to think this is a lot more hassle than it is worth.
BDA- LVL 7 Mobile Armoured Dice Factory
- Posts : 871
EXP : 5917
Join date : 2011-02-09
Age : 44
Re: Wip Eldar corsairs
![]() BDA 2014-09-23, 13:30
BDA 2014-09-23, 13:30
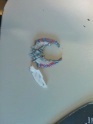
Ok so as you can see I have progressed a bit.

The main jetpack is done but details need to be added.
Rather than get an expensive reprint of an amended shuriken cannon I decided to fix the issues I had old one with some bit I cut from an spar plastic one I had laying around.
Seeing as I am somewhat low on money at the moment I might have to hold off casting the stuff but I can use the time to smarten some things out and add detail not to mention give wing set C a go
BDA- LVL 7 Mobile Armoured Dice Factory
- Posts : 871
EXP : 5917
Join date : 2011-02-09
Age : 44
BDA- LVL 7 Mobile Armoured Dice Factory
- Posts : 871
EXP : 5917
Join date : 2011-02-09
Age : 44
Re: Wip Eldar corsairs
![]() BDA 2014-10-03, 13:00
BDA 2014-10-03, 13:00
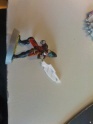
Ok so little update this time with a comparison of the two different wings together
It has been quite slow going due to work and other commitments but rather happy with it all so far.
Just need to find the time and money to try my hand at some making a mould but should do a bit more research into that first I think.
It has been quite slow going due to work and other commitments but rather happy with it all so far.
Just need to find the time and money to try my hand at some making a mould but should do a bit more research into that first I think.
BDA- LVL 7 Mobile Armoured Dice Factory
- Posts : 871
EXP : 5917
Join date : 2011-02-09
Age : 44
Re: Wip Eldar corsairs
![]() BDA 2014-12-01, 16:27
BDA 2014-12-01, 16:27
Well I got my casting stuff arrive so I will try and get my bottom into gear and make a mould this week and have a go at casting in it.
i also have my Avatar painted for the campaign
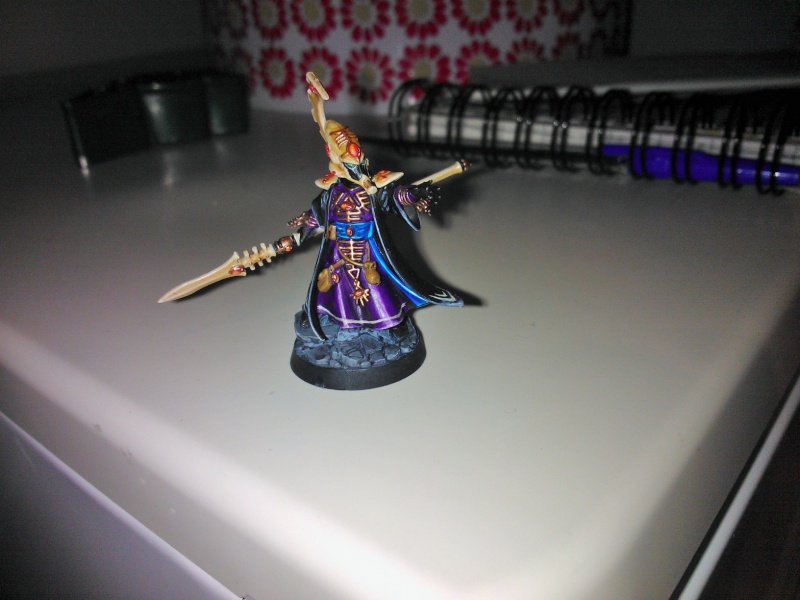
i also have my Avatar painted for the campaign
BDA- LVL 7 Mobile Armoured Dice Factory
- Posts : 871
EXP : 5917
Join date : 2011-02-09
Age : 44
Re: Wip Eldar corsairs
![]() BDA 2014-12-02, 13:31
BDA 2014-12-02, 13:31
So far so good
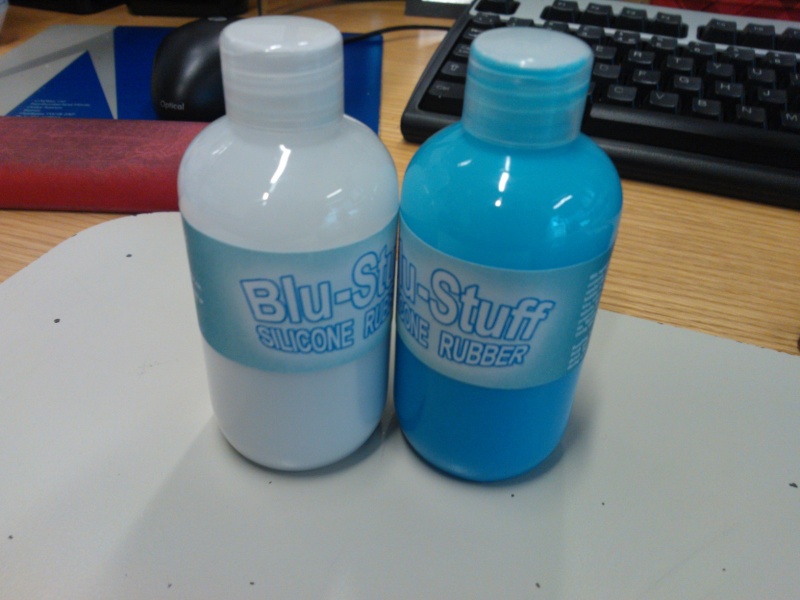
I have decided to go for blu-stuff as my mould as it is cures quick and is more forgiving than other products I believe but is also more expensive but for the small stuff I want to do at the moment that is fine. You can get it from blu-stuff. Com or form eBay.
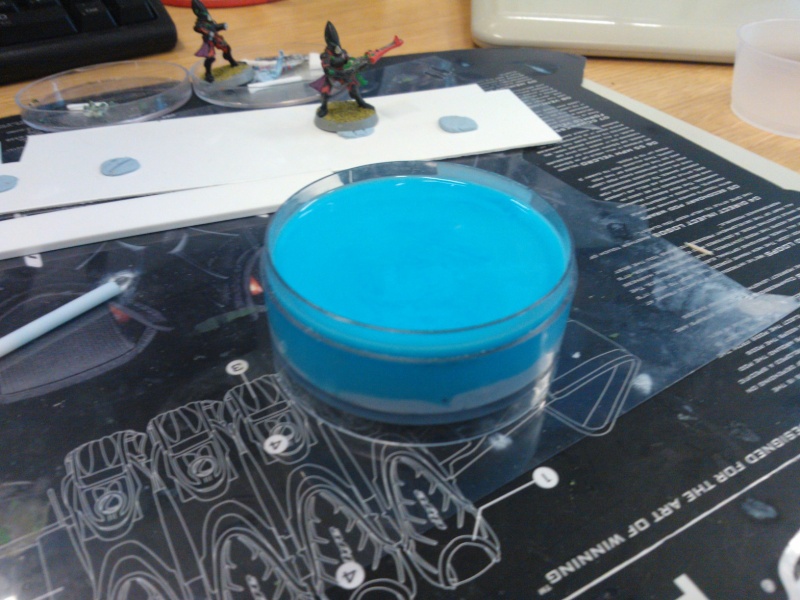
Being impatient I got hold of some blue-tack and a small container t start my firs mould. I layered the blue tack at the bottom of the small container and pressed the parts in to it, trying to ensure that they whey where halfway in .
then I mixed equal parts of the two parts of blu-stuff and pored that in over the top slowly. The hole time trying to minimise air bubbles. You have to work quite quick here mind. One I was all poured in I have it a good tap on all sides to ensure any air bubbles where loosed. It should be ready in about 20 minutes but after 10 it had already set quite well but best to leave it the entire time.
next up if this all worked well then I should be able to pull the mould free and then remove the blue-tack and poor more Blu-stuff over the first part of the mould I did (leaving the parts in place).
Will need to cut some channels in there but this is really just a rest run to see how much detail it holds and if I am along the right lines.
I have mixed the top part but will have to have a sneaky peak later to see if it worked or not as lunch is very much over now
Not sure when I will get round to mixing the resin but soon I hope
I have decided to go for blu-stuff as my mould as it is cures quick and is more forgiving than other products I believe but is also more expensive but for the small stuff I want to do at the moment that is fine. You can get it from blu-stuff. Com or form eBay.
Being impatient I got hold of some blue-tack and a small container t start my firs mould. I layered the blue tack at the bottom of the small container and pressed the parts in to it, trying to ensure that they whey where halfway in .
then I mixed equal parts of the two parts of blu-stuff and pored that in over the top slowly. The hole time trying to minimise air bubbles. You have to work quite quick here mind. One I was all poured in I have it a good tap on all sides to ensure any air bubbles where loosed. It should be ready in about 20 minutes but after 10 it had already set quite well but best to leave it the entire time.
next up if this all worked well then I should be able to pull the mould free and then remove the blue-tack and poor more Blu-stuff over the first part of the mould I did (leaving the parts in place).
Will need to cut some channels in there but this is really just a rest run to see how much detail it holds and if I am along the right lines.
I have mixed the top part but will have to have a sneaky peak later to see if it worked or not as lunch is very much over now
Not sure when I will get round to mixing the resin but soon I hope
BDA- LVL 7 Mobile Armoured Dice Factory
- Posts : 871
EXP : 5917
Join date : 2011-02-09
Age : 44
Re: Wip Eldar corsairs
![]() BDA 2014-12-09, 13:28
BDA 2014-12-09, 13:28
Well it looks like my second attempt for a 2 part mould worked a lot better than the first that is for sure lol

Will need to cut some channels to poor the resin in and might give that a little go at the weekend if I have time.
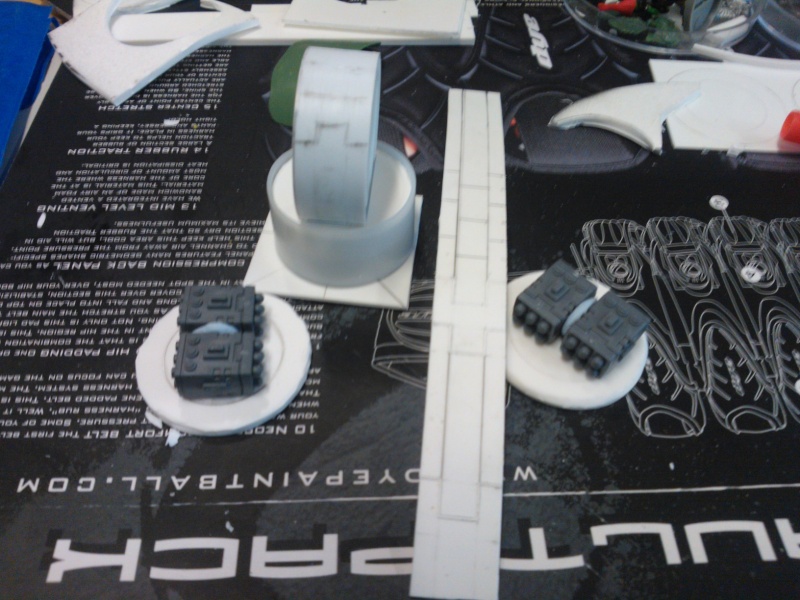
Also working on a Tau AA defence to go with my pot noodle defence line.
This is made from two small tap reels and some 1mm thick plasticard so far but I will adding some green stuff ribbing along with some SMS systems from the riptide and areal. The idea is it is a quad gun equivalent.

Will need to cut some channels to poor the resin in and might give that a little go at the weekend if I have time.
Also working on a Tau AA defence to go with my pot noodle defence line.
This is made from two small tap reels and some 1mm thick plasticard so far but I will adding some green stuff ribbing along with some SMS systems from the riptide and areal. The idea is it is a quad gun equivalent.
BDA- LVL 7 Mobile Armoured Dice Factory
- Posts : 871
EXP : 5917
Join date : 2011-02-09
Age : 44

BDA- LVL 7 Mobile Armoured Dice Factory
- Posts : 871
EXP : 5917
Join date : 2011-02-09
Age : 44
Re: Wip Eldar corsairs
![]() BDA 2014-12-13, 01:08
BDA 2014-12-13, 01:08
well the mould is working well by the looks of it.
first off some update pics of a mould i made for a base.

then we got a load of progress pics of the casting.


the one part base mould did not seem to want to work all that well and i got a lot of bubbles for some reason but i am guessing that is because i used a syringe the 2 part mould worked very well but i feel that is because i used a syringe to fill it from the bottom and the pressure helped push the air out.
i should point out that all this has been an experiment to let me get use to the the materials i will be working with and i have learnt a lot of stuff. not lest of all that you wont get blu-stuff out the carpet once it has set lol.
the two part mould was not perfect in the first place but it very much looks like i went down the right lines.
the resin i used starts to go very hard and is measured by weight. if anyone knows a slower curing resin that has a longer working time and is a 1:1 volume mix that would be very helpful to know.
oh as a helpful hint i used syringes to suck up the separate parts of resin and make sure i got the correct weight of each part.
first off some update pics of a mould i made for a base.
then we got a load of progress pics of the casting.
the one part base mould did not seem to want to work all that well and i got a lot of bubbles for some reason but i am guessing that is because i used a syringe the 2 part mould worked very well but i feel that is because i used a syringe to fill it from the bottom and the pressure helped push the air out.
i should point out that all this has been an experiment to let me get use to the the materials i will be working with and i have learnt a lot of stuff. not lest of all that you wont get blu-stuff out the carpet once it has set lol.
the two part mould was not perfect in the first place but it very much looks like i went down the right lines.
the resin i used starts to go very hard and is measured by weight. if anyone knows a slower curing resin that has a longer working time and is a 1:1 volume mix that would be very helpful to know.
oh as a helpful hint i used syringes to suck up the separate parts of resin and make sure i got the correct weight of each part.
BDA- LVL 7 Mobile Armoured Dice Factory
- Posts : 871
EXP : 5917
Join date : 2011-02-09
Age : 44
Re: Wip Eldar corsairs
![]() BDA 2014-12-13, 01:10
BDA 2014-12-13, 01:10
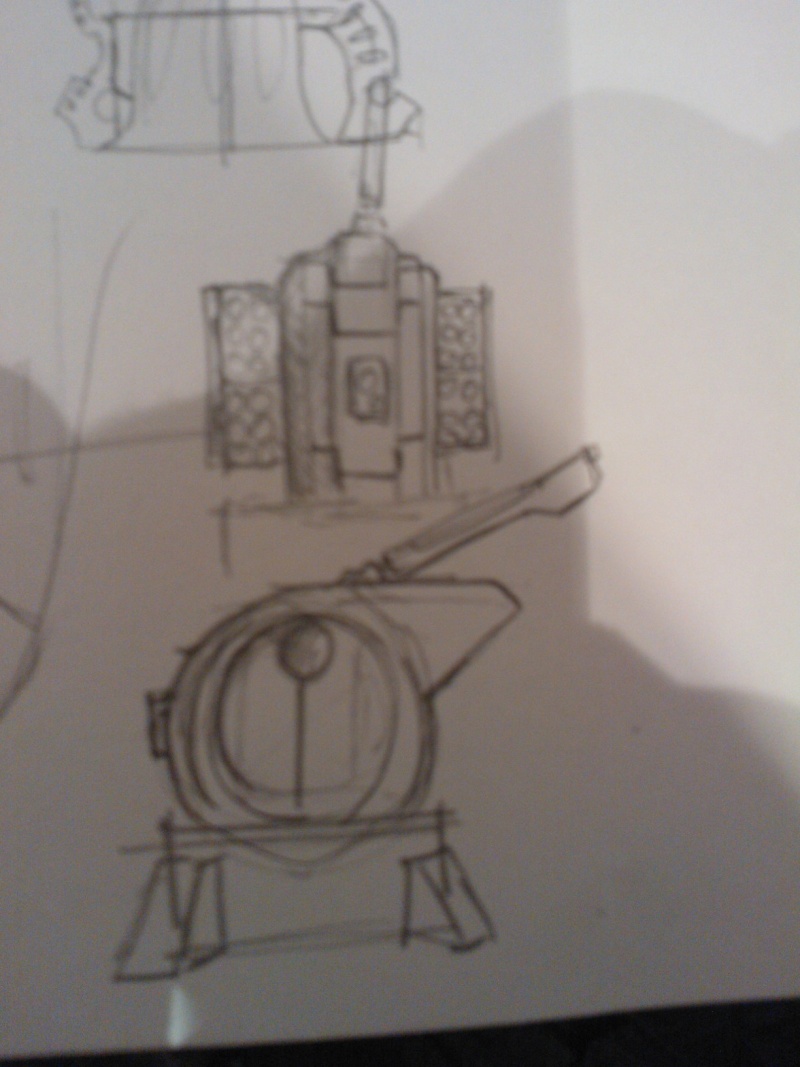
also a little progress shot of my Tau AA turret. have some concept sketches i will have to add at some point.
BDA- LVL 7 Mobile Armoured Dice Factory
- Posts : 871
EXP : 5917
Join date : 2011-02-09
Age : 44
Re: Wip Eldar corsairs
![]() BDA 2014-12-15, 00:19
BDA 2014-12-15, 00:19
ok here is a pic of some of my Dark eldar warriors to go with the raiders

and the concepts drawings for my AAD (Anti-Air Defense)
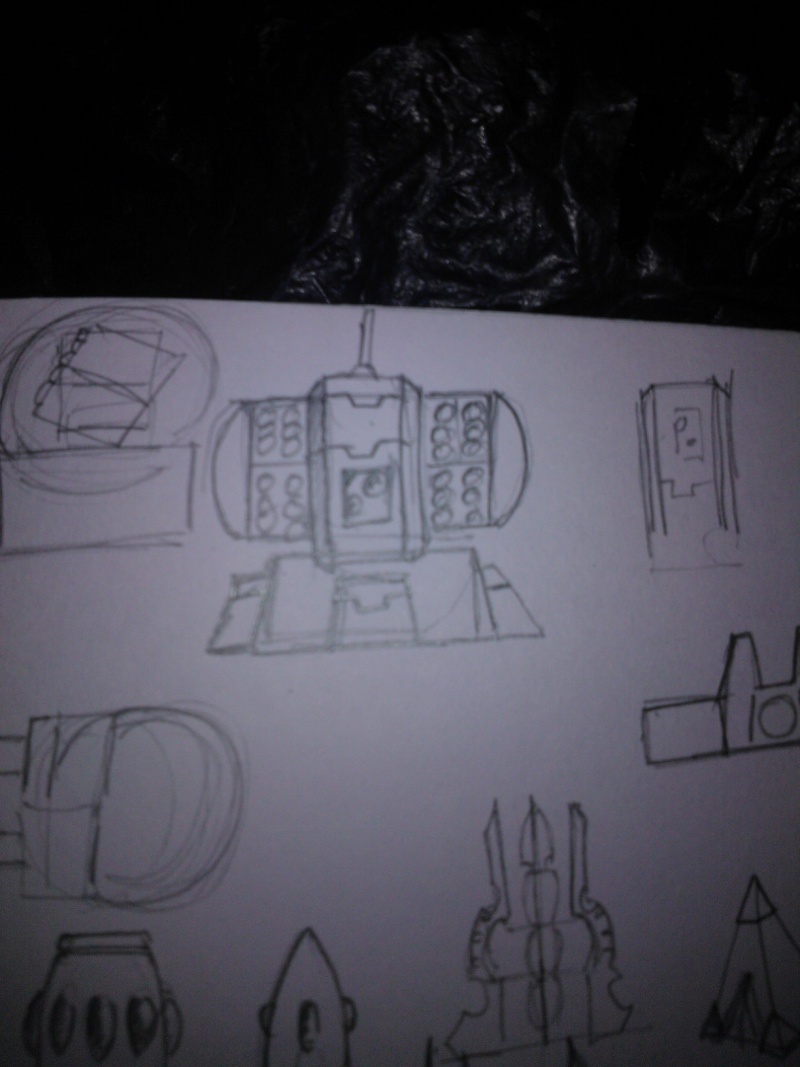
and the concepts drawings for my AAD (Anti-Air Defense)
BDA- LVL 7 Mobile Armoured Dice Factory
- Posts : 871
EXP : 5917
Join date : 2011-02-09
Age : 44
Re: Wip Eldar corsairs
![]() BDA 2014-12-18, 00:22
BDA 2014-12-18, 00:22
here are 2 of the bases i have done with a wash so you can see the detail better. all in all i am very happy chap lol

BDA- LVL 7 Mobile Armoured Dice Factory
- Posts : 871
EXP : 5917
Join date : 2011-02-09
Age : 44
Re: Wip Eldar corsairs
![]() BDA 2014-12-19, 12:51
BDA 2014-12-19, 12:51
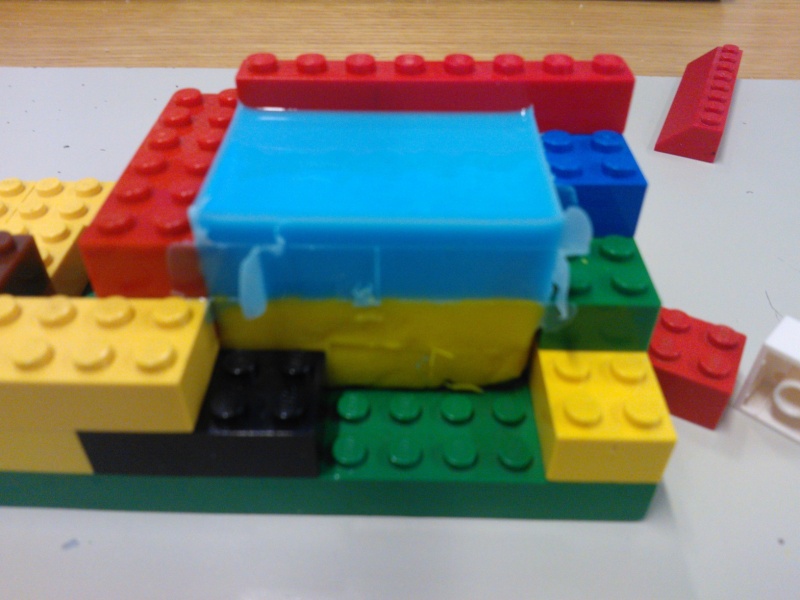
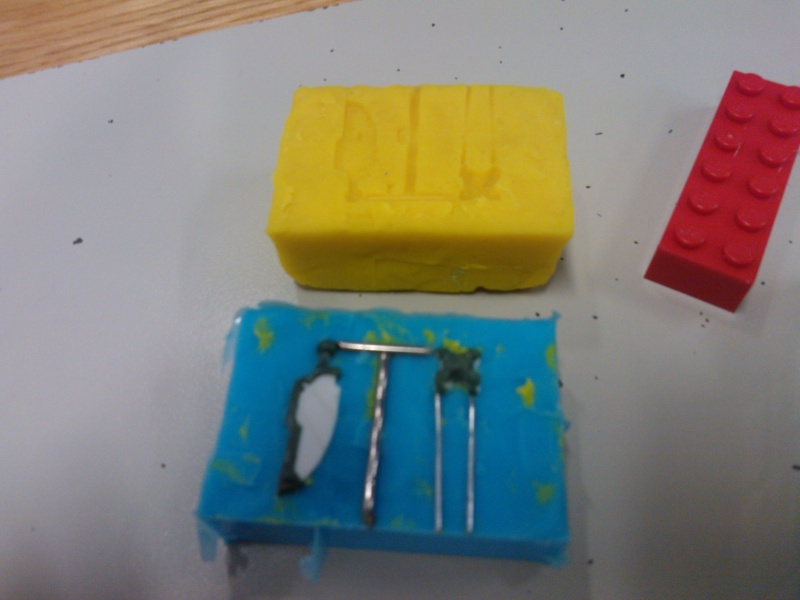
Right chaps I thought I would walk you through what I have done to create 2 part moulds.
First off I used Lego to create a frame and backed the lower half with play-doh.
Into this I pushed the parts I want to mould halfway in making sure there are no gaps to allow the blu-stuff underneath them.
I then use paper clips to create channels for the resin to run down.
The way I have set it up here is I will inject resin in the top down a central channel that will then go off in either direction at the bottom and then fill the cavity up from the bottom pushing air out the top. this seemed to work well on my first test run.
Mix and pour the blu-stuff on top and allow it to harden. (I found mix of 20ml was enough for each side of this mould.)
Once the blu-stuff is dry in about 20 minutes then you pull the Lego apart and remove the play-doh. play-doh is very good here as it is not to sticky and should not pull the master parts out of the blu-stuff. If it does just put them back as best you can.

Then flip the blu-stuff so it is on the bottom and coat it in something that will create a barrier else the stuff you pour in will bond with the bottom half (I found Aqueous cream worked) just don’t get it on your master parts as it might lessen the detail the blu-stuff picks up but I have heard some people use dusting spray as it contains wax and not sure if this will lose detail or not. build the Lego back round to it till you have a well and then fill with blue stuff till it is cured.
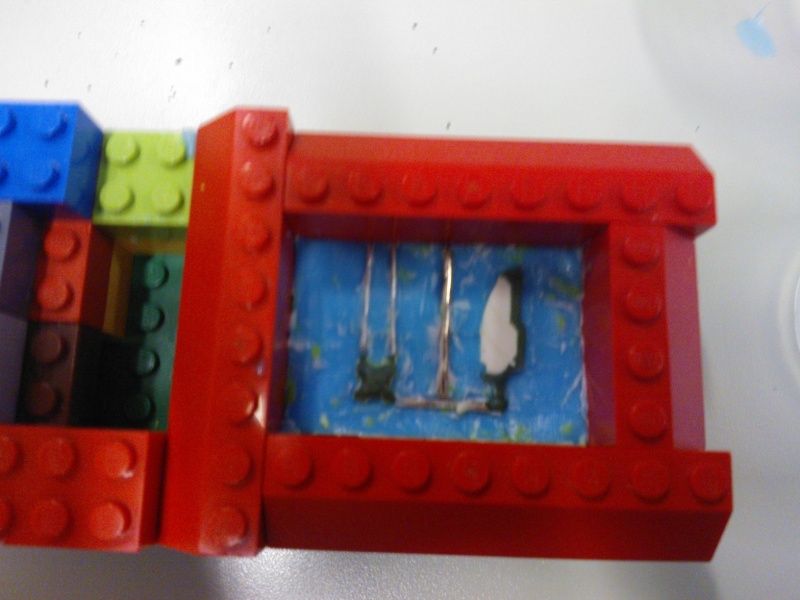
Once cured pull the Lego apart and then separate the 2 halfs. It might take a little bit of effort and sharp knife.
You might need to cut away some parts to make sure the channels are clear for the resin to run down but you should now have a mould to cast into.

In the new year I will try and cover using the resin to cast with.
First off I used Lego to create a frame and backed the lower half with play-doh.
Into this I pushed the parts I want to mould halfway in making sure there are no gaps to allow the blu-stuff underneath them.
I then use paper clips to create channels for the resin to run down.
The way I have set it up here is I will inject resin in the top down a central channel that will then go off in either direction at the bottom and then fill the cavity up from the bottom pushing air out the top. this seemed to work well on my first test run.
Mix and pour the blu-stuff on top and allow it to harden. (I found mix of 20ml was enough for each side of this mould.)
Once the blu-stuff is dry in about 20 minutes then you pull the Lego apart and remove the play-doh. play-doh is very good here as it is not to sticky and should not pull the master parts out of the blu-stuff. If it does just put them back as best you can.
Then flip the blu-stuff so it is on the bottom and coat it in something that will create a barrier else the stuff you pour in will bond with the bottom half (I found Aqueous cream worked) just don’t get it on your master parts as it might lessen the detail the blu-stuff picks up but I have heard some people use dusting spray as it contains wax and not sure if this will lose detail or not. build the Lego back round to it till you have a well and then fill with blue stuff till it is cured.
Once cured pull the Lego apart and then separate the 2 halfs. It might take a little bit of effort and sharp knife.
You might need to cut away some parts to make sure the channels are clear for the resin to run down but you should now have a mould to cast into.
In the new year I will try and cover using the resin to cast with.
BDA- LVL 7 Mobile Armoured Dice Factory
- Posts : 871
EXP : 5917
Join date : 2011-02-09
Age : 44
Re: Wip Eldar corsairs
![]() BDA 2015-01-10, 00:03
BDA 2015-01-10, 00:03
well the home casting has not worked out as well as i liked so back to the drawing board on the backpack front at least.
this week i have mainly been working on my Tau AAD system
enjoy

this week i have mainly been working on my Tau AAD system
enjoy
BDA- LVL 7 Mobile Armoured Dice Factory
- Posts : 871
EXP : 5917
Join date : 2011-02-09
Age : 44
Re: Wip Eldar corsairs
![]() BDA 2015-01-13, 00:20
BDA 2015-01-13, 00:20
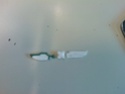
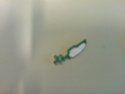
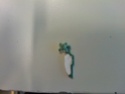
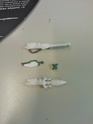
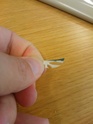
so a little update on the corsair jetpack. i made a mould of the dark eldar warrior heavy weapon back pack so that i could make new casts of it if my working one goes wrong.
i plan to do a one part mould of it as they seem to give best results and then green stuff buckles when i attach them to the figures
anyway have a look see.
i plan to do a one part mould of it as they seem to give best results and then green stuff buckles when i attach them to the figures
anyway have a look see.
BDA- LVL 7 Mobile Armoured Dice Factory
- Posts : 871
EXP : 5917
Join date : 2011-02-09
Age : 44
Re: Wip Eldar corsairs
![]() BDA 2015-01-23, 23:57
BDA 2015-01-23, 23:57
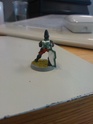
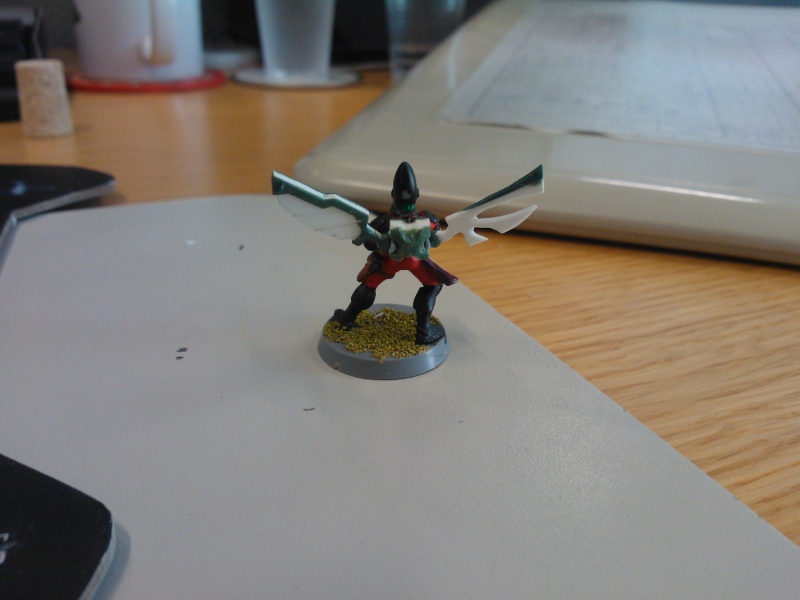
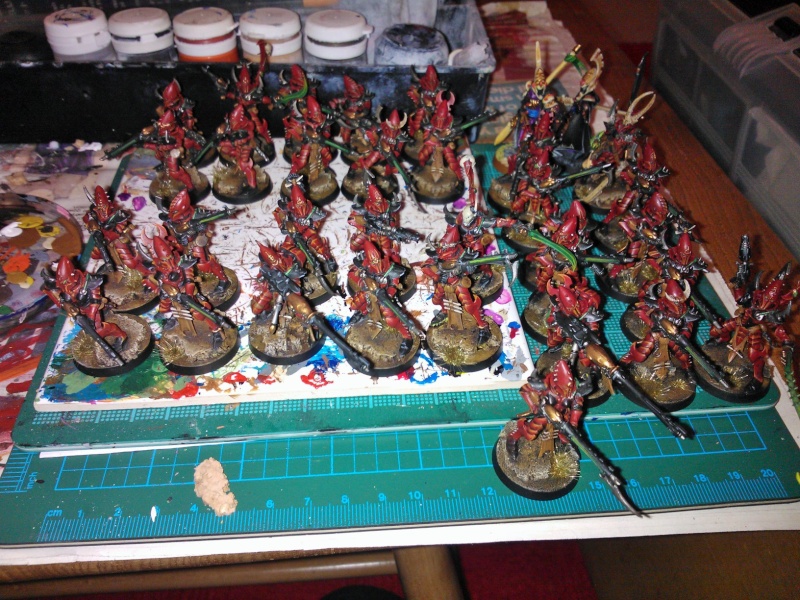
OK so this month i have been painting 5 my Eldar wraith blades so i got a squad of 10 now
i also used my cast bases on these ones and they had really good detail but dose not like taking paint all that much lol.

i am tempted to try casting it to make more but not 100% sure on that but if i did would any of you be interested in buying one if i did? not sure on cost until i find the right resin.
i have also been working on my Tau AAD system and am very pleased with the progress. the legs are made from a 25mm round base cut in half.

i also used my cast bases on these ones and they had really good detail but dose not like taking paint all that much lol.
i am tempted to try casting it to make more but not 100% sure on that but if i did would any of you be interested in buying one if i did? not sure on cost until i find the right resin.
i have also been working on my Tau AAD system and am very pleased with the progress. the legs are made from a 25mm round base cut in half.
BDA- LVL 7 Mobile Armoured Dice Factory
- Posts : 871
EXP : 5917
Join date : 2011-02-09
Age : 44
Re: Wip Eldar corsairs
![]() BDA 2015-02-19, 12:51
BDA 2015-02-19, 12:51
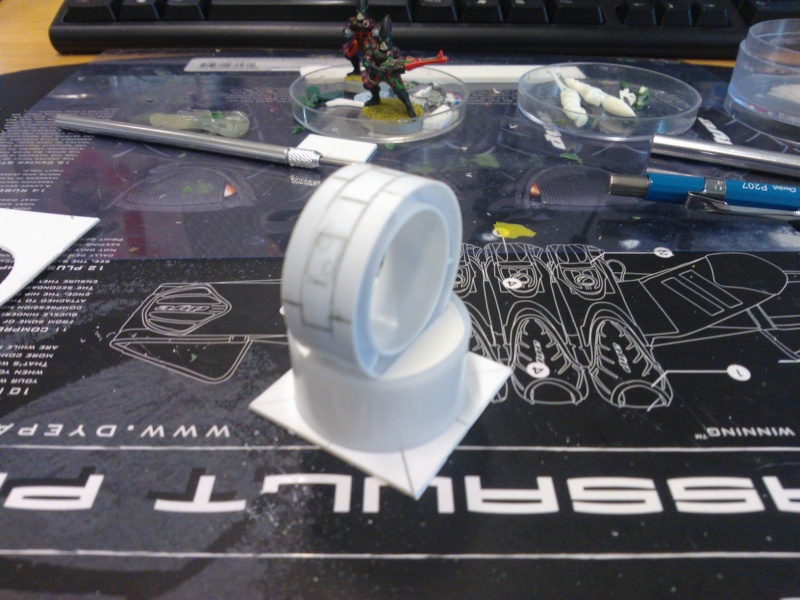
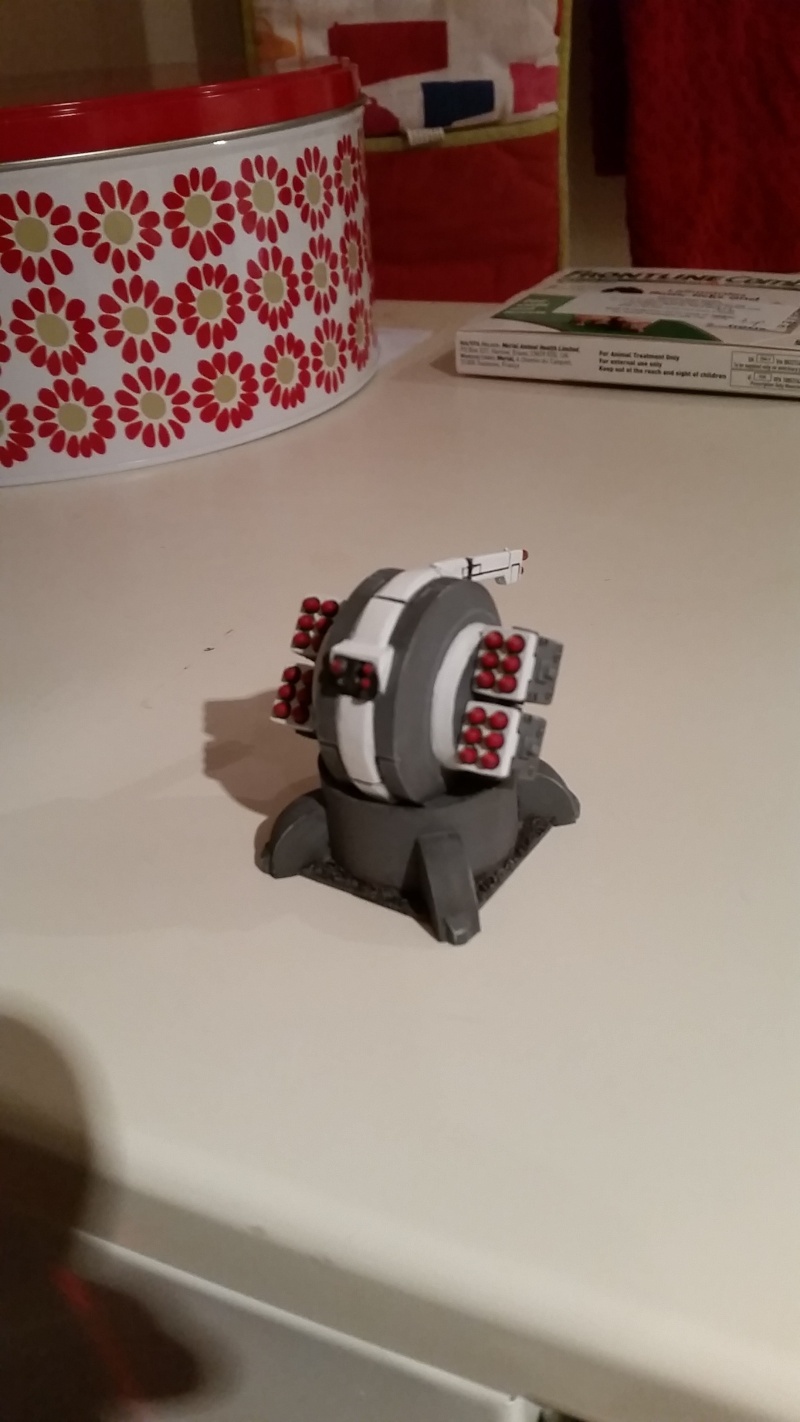
Ok so as you can see I got my little Tau AAD system sorted out at last.
Not bad seeing as it is made from 2 tape rolls, green stuff, plasticard and bits from the bits box. J
I might add some transfers to it as the lower half is a little bare but all in all happy with him and looking forward to his first use, where he will no doubt die before getting a shot off lol
Not bad seeing as it is made from 2 tape rolls, green stuff, plasticard and bits from the bits box. J
I might add some transfers to it as the lower half is a little bare but all in all happy with him and looking forward to his first use, where he will no doubt die before getting a shot off lol
BDA- LVL 7 Mobile Armoured Dice Factory
- Posts : 871
EXP : 5917
Join date : 2011-02-09
Age : 44
Re: Wip Eldar corsairs
![]() BDA 2015-03-11, 13:28
BDA 2015-03-11, 13:28
Ok so a little update on the supply pod objective marker

Early days still and I have a long way to go but it is getting there and you can see the size of it now.
Also as a happy little mistake it can hold a small dice in the fins at the top so you use them to mark the objective number or the mysterious objective effect.
I still need to sort out a few basic bits to make it more symmetrical and then add some detail like hinges and maybe rivets but I plan on making this a 1 part mould so I am limited in what I can do.
I will be making a limited run so if you are interested let me know closer to the time and I can run you off a set of 6 but I need to work out a price as yet depending on the resin I can get.
BDA- LVL 7 Mobile Armoured Dice Factory
- Posts : 871
EXP : 5917
Join date : 2011-02-09
Age : 44
Re: Wip Eldar corsairs
![]() BDA 2015-03-24, 13:29
BDA 2015-03-24, 13:29
Well the pod is taking shape slowly.

Hatches are done and need to do the hinges and lock for them.
Also got a plan for the rivets but see how that works out.
Need to come up with some sort of detail for the fins to brake them up a little but not sure on that yet as my etching ability was somewhat lacking last time lol
Hatches are done and need to do the hinges and lock for them.
Also got a plan for the rivets but see how that works out.
Need to come up with some sort of detail for the fins to brake them up a little but not sure on that yet as my etching ability was somewhat lacking last time lol
BDA- LVL 7 Mobile Armoured Dice Factory
- Posts : 871
EXP : 5917
Join date : 2011-02-09
Age : 44
Re: Wip Eldar corsairs
![]() BDA 2015-04-01, 21:59
BDA 2015-04-01, 21:59
and now for something different
my storm Talon is now finished with all the weapon options.

i have taken a pic of the control panel but it has not come out all that well

my storm Talon is now finished with all the weapon options.
i have taken a pic of the control panel but it has not come out all that well
BDA- LVL 7 Mobile Armoured Dice Factory
- Posts : 871
EXP : 5917
Join date : 2011-02-09
Age : 44
Re: Wip Eldar corsairs
![]() BDA 2015-04-02, 14:13
BDA 2015-04-02, 14:13
Ok so little update on the pod objective

The locks are done and the hinges are almost finished.
I have made a little template to etch the guidance parts for the fins to give them a little detail and I have created a little template (notch in some card) to try and get consistent length rivets that I am making from some green stuff I rolled nice and thin.
All in all slow but steady progress.
BDA- LVL 7 Mobile Armoured Dice Factory
- Posts : 871
EXP : 5917
Join date : 2011-02-09
Age : 44
Page 4 of 5 • 1, 2, 3, 4, 5 ![]()
Warbunka - BRGA :: Community :: Gallery
Page 4 of 5
Permissions in this forum:
You cannot reply to topics in this forum
» BRGALeeg 2017 IGuana Eat You Skill Roll
» BRGALeeg 2017 Forge Fathers Skill Rolls
» skill rolls orctastic black orc & lineman
» Pre Season Skill roll, Tony Bagnor Bay Brawlers Black Orc 3
» Fishlegs - New DOUBLE Skill
» Pre Season Skill Roll Sam Shepherd Skink Fishlegs
» Thorgrimm, Skill Roll
» Pre-Season Skill Roll Ryan Hodgetts Dwarf Blitzer Thorgrimm